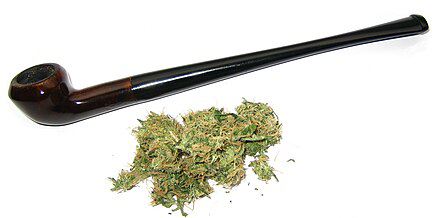
Bongs have long been a popular method for consuming various herbs, particularly in the world of cannabis enthusiasts. These water pipes offer a smoother smoking experience by filtering the smoke through water, which cools it down and removes some of the harmful particulates. One of the essential components of a bong is the bowl, where the herbs are placed and ignited. While many users purchase pre-made bowls, creating a DIY bowl for your bong can be a fun and rewarding project that allows for customization and creativity.
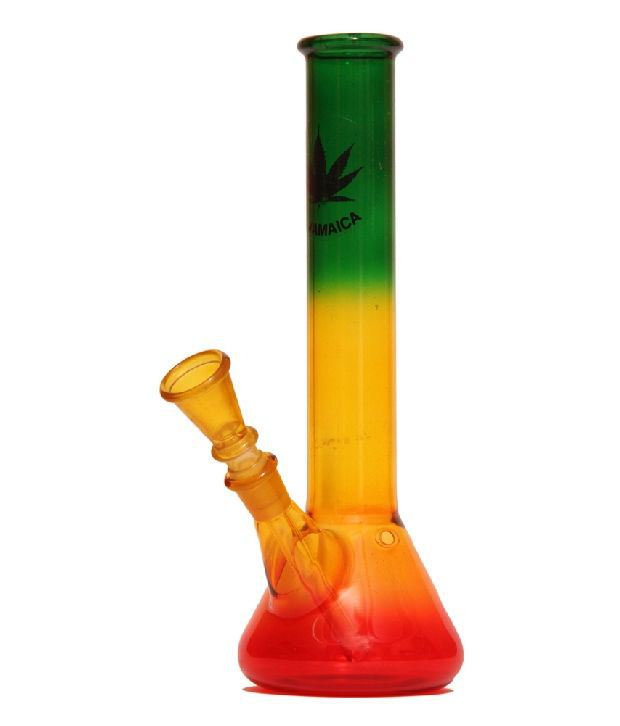
Before diving into the process of making a DIY bowl, it’s essential to understand the overall structure of a bong. A typical bong consists of several parts: the base, the neck, the bowl, and the downstem. The base holds the water, the neck is the long tube that leads to the mouthpiece, the bowl holds the herbs, and the downstem connects the bowl to the water chamber. Each part plays a crucial role in the smoking experience, and a well-designed bowl can enhance the efficiency and enjoyment of using a bong.
To create a DIY bowl for your bong, you’ll need a few basic materials. The good news is that many of these items can be found around your home or at a local hardware store. Here’s a list of what you might need:
Now that you have your materials ready, let’s walk through the process of creating your own bowl for your premium green acrylic bong durable and smooth. This guide will outline a simple method that is both effective and easy to follow.
The first step in making a DIY bowl is selecting the right base material. Many people opt for a small metal socket or a ceramic cup. If you’re using metal, ensure it is heat-resistant and safe for smoking. If you choose to use an aluminum foil bowl, make sure to mold it carefully to avoid any sharp edges that could tear or cause discomfort.
If you’re using a socket, you may not need to do much to it, but if you’re using aluminum foil, you’ll want to create a small bowl shape. Take a piece of foil and crumple it into a ball, then flatten it slightly to form a small dish that can hold your herbs. Make sure the edges are turned up to prevent the herbs from falling out.
Next, you’ll need to create a hole for the downstem. If you’re using a socket or a small cup, you can drill a hole at an angle to fit the downstem snugly. The hole should be just large enough to allow the downstem to fit without wobbling, which can affect the airflow and smoking experience.
If you’ve drilled a hole, it’s essential to smooth the edges to avoid any sharp parts that could cut your fingers or lips. Use sandpaper to gently file down any rough edges around the hole. This step is crucial for safety and comfort while using your bong.
Once your bowl shape is ready and the hole is smooth, it’s time to assemble your DIY bowl. Insert the downstem into the hole you created, ensuring it angles downward into the water chamber. If necessary, you can use a small amount of silicone or adhesive to secure it in place, but be cautious about using materials that could release harmful fumes when heated.
Before using your new bowl with your bong, it’s a good idea to test it out without any herbs. Fill your bong with water, attach your DIY bowl, and take a few test puffs to ensure that the airflow is smooth and there are no leaks. If everything works well, you’re ready to load it up with your favorite herbs!
Creating a DIY bowl for your gravity bong has several benefits. Firstly, it allows for customization, enabling you to design a bowl that fits your specific preferences and needs. Secondly, it can save you money, as purchasing replacement bowls can be costly. Lastly, the process of making your own bowl can be a fun and creative outlet, allowing you to experiment with different materials and designs.
While making a DIY bowl can be enjoyable, it’s essential to prioritize safety. Always ensure that the materials you use are heat-resistant and safe for smoking. Avoid using plastic or other materials that can release harmful chemicals when heated. Additionally, be mindful of sharp edges and secure any loose parts to prevent accidents when using your bong.
In conclusion, crafting a DIY bowl for your bong is an excellent way to enhance your smoking experience while allowing for creativity and personalization. With a few simple materials and steps, you can create a functional and stylish bowl that suits your needs. Whether you’re a seasoned bong user or a newcomer to the world of water pipes, making your own bowl can be a rewarding project that enhances your enjoyment of smoking herbs. So gather your materials, follow the steps outlined in this guide, and enjoy the satisfaction of using a bowl that you made yourself!